Choosing a Vacuum Relief Valve is not a minor purchasing decision. It can protect a storage tank when internal pressure falls below safe operating limits.
A blocked vent, rapid cooling, or sudden product withdrawal may create damaging vacuum conditions. The right valve must respond quickly, seal reliably, and match the vessel’s operating environment. It also needs suitable materials, connection sizes, pressure settings, and flow capacity. Small details matter.
Process-safety pioneer Trevor Kletz often reminded engineers, “What you don’t know can hurt you.” That warning fits valve selection closely. A valve may look correct on a specification sheet yet perform poorly with viscous liquids, corrosive vapors, cold weather, or frequent cycling. Real operating conditions expose those weaknesses.
This guide presents seven practical tips for choosing a Vacuum Relief Valve. It considers tank volume, vacuum pressure, airflow requirements, installation position, maintenance access, and compatibility with recognized engineering standards. The goal is not to choose the largest valve. Oversizing can create unstable operation and unnecessary cost.
Look closely.
Field experience also teaches an uncomfortable lesson: calculations are only as reliable as their assumptions. A clean drawing may hide a partially blocked vent line. A perfect test result may not represent years of dust, moisture, or chemical exposure. Therefore, selection should combine engineering data with inspection history and practical plant knowledge.
These tips will help engineers, maintenance teams, and equipment buyers compare options with greater confidence. They cannot replace a qualified design review. They can, however, prevent avoidable mistakes before a tank, process, or production schedule is placed at risk.
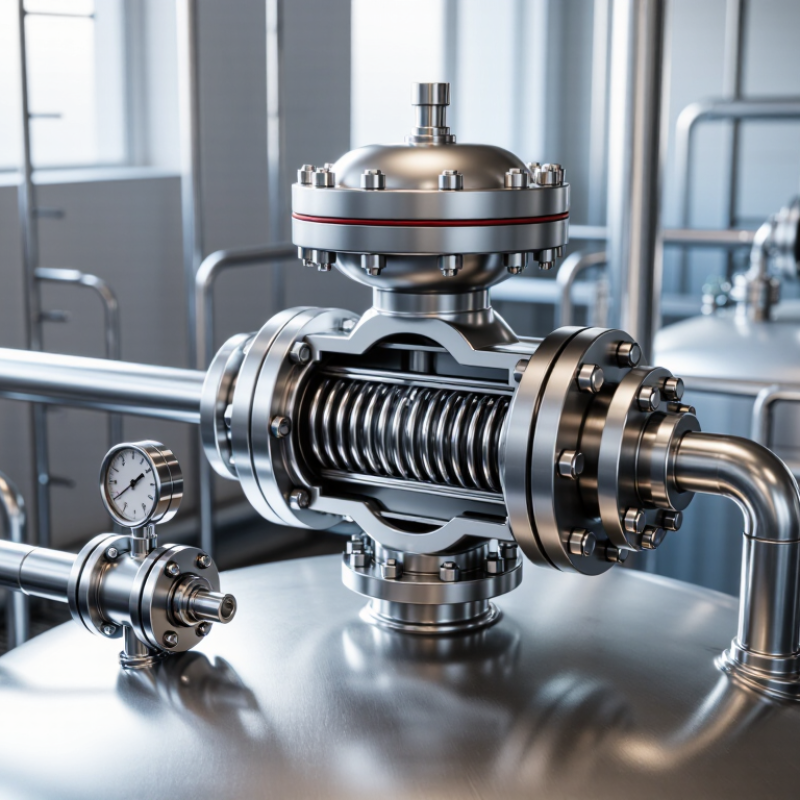
Before selecting a vacuum relief valve, define what “vacuum” means in your system. Record the lowest expected absolute pressure, not only the gauge reading. A tank showing -80 kPa may face different conditions at high altitude. Measure normal operation, startup, shutdown, cleaning, and emergency cooling. These events often create the real design case. I have seen vessels pull vacuum during steam condensation faster than operators expected. Small details matter. Note temperature, gas composition, humidity, and corrosive vapors. A warm vessel can cool sharply after isolation, changing internal pressure within minutes.
Translate those conditions into system requirements. Specify the valve’s opening pressure, required relieving capacity, allowable external pressure, and acceptable leakage rate. Check whether the device must admit air, nitrogen, or another compatible gas. The choice affects corrosion, contamination, and process quality. Calculate flow using vessel volume, connected piping, pump capacity, and the fastest credible pressure drop. Do not size from pump horsepower alone. That shortcut can mislead. Include blocked vents, control failures, filter loading, and liquid sloshing where relevant. Confirm the set point stays above the vessel’s structural vacuum limit, with suitable margin.
Review material compatibility at the highest temperature, lowest temperature, and cleaning condition. Verify connection size, mounting direction, drainage, and access for inspection. A valve may meet the datasheet yet fail in a wet, dirty installation. Test the selected assumptions with operating data when possible. Pressure transmitters, trend records, and controlled shutdown trials can reveal hidden vacuum events. Keep a written design basis showing each assumption, calculation, and uncertainty. Field conditions are rarely perfect. Recheck the design after process changes, vessel modifications, or a different cleaning method.
Choosing a vacuum relief valve begins with the vessel’s failure risk, not the pipe connection.
API 521 identifies external cooling, liquid withdrawal, and blocked-in vapor condensation as common causes of internal vacuum.
Each case can produce a different load profile.
A weighted-pallet valve suits clean, low-pressure storage tanks.
A spring-loaded valve may respond better when vibration or changing pressure conditions are expected.
Combination devices can protect against both vacuum and positive pressure.
Define the operating pressure range in absolute and gauge units.
This matters.
For example, a tank operating near -2 kPa(g) may need protection before reaching its -5 kPa(g) design vacuum limit.
A preliminary set point near -3.5 kPa(g) could provide margin, but it is only an engineering example.
Confirm it through a vacuum-load calculation and the vessel manufacturer’s limits.
ISO 4126-1 emphasizes verified set pressure, capacity, and functional testing for pressure-relief devices; the same discipline should guide vacuum service.
Check the valve’s certified flow capacity at the actual vacuum level, temperature, and gas composition.
Air capacity data can mislead when the system contains solvent vapor or condensable moisture.
Keep the inlet short and inspect the seat area for dust.
Small restrictions can defeat a correctly sized valve.
Field reviews often reveal a simple error: the set pressure was selected in kPa absolute, while the operating sheet used kPa gauge.
That mistake is easy to make.
It is also expensive.
Recheck units, accumulation, discharge routing, and maintenance access before approval.
7 Tips for Choosing a Vacuum Relief Valve
Match Valve Materials to the Process Environment
A vacuum relief valve protects tanks, vessels, and piping from damaging pressure collapse. Material selection deserves careful attention. During equipment reviews, I have seen corrosion begin around threads and spring housings. The valve still looked usable. It was not.
Start with the process fluid, vapor, and cleaning chemicals. Stainless steel suits many wet and mildly corrosive environments. More aggressive chemicals may require special alloys or engineered plastics. Do not judge compatibility from the fluid name alone. Concentration, temperature, and exposure time can change performance. Small details matter. Check the wetted body, disc, spring, seat, and seals separately. A strong valve body cannot compensate for a weakened elastomer.
Temperature cycling also affects material choice. A seal that works at room temperature may harden near a hot vessel. Cold service can make some plastics brittle. Humidity and outdoor exposure create additional risks, especially around dissimilar metals. Consider galvanic corrosion before installation. It is easy to overlook. Review the valve after cleaning, steaming, or sanitizing cycles. In one assessment, the operating temperature seemed acceptable, but repeated heat cycles reduced seal flexibility. That finding changed the specification. Ask for documented compatibility data, then compare it with real operating conditions. A perfect match is not always realistic, but an unverified choice is difficult to defend.
Choosing a vacuum relief valve starts with capacity, not the connection thread. Estimate the maximum inward flow from cooling, draining, pump-out, and inert-gas condensation. API Standard 2000 and ISO 28300 require designers to consider normal and emergency venting conditions. Their calculation methods use vessel volume, temperature change, gas properties, and allowable vacuum pressure. Capacity comes first.
Response time must match the process. A slow valve may protect a quiet storage tank but fail during rapid pump-out. Check the manufacturer’s opening pressure, full-lift flow rate, and reseating behavior under realistic conditions. Test results should identify air or gas conditions, temperature, and pressure units. A published flow number without those details is weak evidence. Field commissioning often exposes this gap.
Connection size also affects performance. A small nozzle, long pipe, or sharp elbow can create pressure loss before the valve senses the tank vacuum. Compare the valve’s effective flow area with the vessel nozzle and inlet piping. A larger connection does not automatically provide greater protection. It may only add cost and installation space. For a 10 m³ vessel, calculate the actual pump-out rate rather than choosing a familiar size. That shortcut fails. Review the pressure-drop calculation against API 2000, then confirm the selected set point remains below the vessel’s allowable external pressure. I would also document uncertainty, because atmospheric pressure, cold weather, and imperfect maintenance can change the result.
| No. | Selection Criterion | What to Evaluate | Practical Guidance | Illustrative Requirement | Why It Matters |
|---|---|---|---|---|---|
| 1 | Valve Capacity | Confirm the required air or gas inflow during pump-out, draining, cooling, or accidental vacuum conditions. Review the rated capacity at the actual operating vacuum and temperature. | Select a valve with capacity greater than the calculated maximum inflow requirement. Use the manufacturer’s certified flow data rather than the nominal port size alone. | Required inflow: 420 m³/h Target valve capacity: at least 500 m³/h |
Insufficient capacity can allow the vessel pressure to fall below its allowable vacuum rating. |
| 2 | Response Time | Check how quickly the valve opens after the pressure reaches the vacuum set point and how rapidly it reaches the required flow rate. | Use a fast-acting design for vessels exposed to sudden pump-out or high-rate draining. Consider the effects of viscosity, temperature, and sticky process vapors on movement. | Opening response: no more than 1 second under specified test conditions | A slow response may permit damaging differential pressure before atmospheric air enters the vessel. |
| 3 | Vacuum Set Pressure | Determine the minimum internal pressure the vessel can safely withstand and compare it with the valve’s opening set point. | Set the valve to open before the vessel reaches its allowable vacuum limit. Include instrument uncertainty, seat tolerance, and operating fluctuations in the evaluation. | Valve opens at −5 mbar gauge Vessel allowable limit: −8 mbar gauge |
An unsuitable set pressure can cause structural deformation, buckling, or loss of containment. |
| 4 | Connection Size and Type | Match the valve connection with the vessel nozzle, piping standard, available installation space, and required flow area. | Do not reduce the effective flow area with an undersized nozzle, restrictive elbow, screen, or long inlet pipe. Verify flange rating or threaded connection requirements. | Connection: DN100 flanged Nominal size: 4 in |
Incorrect sizing can restrict flow, increase pressure loss, and make installation or maintenance difficult. |
| 5 | Materials and Process Compatibility | Assess compatibility with the process fluid, vapors, cleaning chemicals, temperature range, and environmental conditions. | Select body, disc, spring, gasket, and seat materials individually. Consider corrosion, permeation, embrittlement, and low-temperature effects. | Body: stainless steel Seal: fluoropolymer suitable for the process range |
Material incompatibility can cause leakage, sticking, corrosion, or premature failure. |
| 6 | Operating Temperature and Environment | Verify the valve’s minimum and maximum operating temperatures, outdoor exposure, humidity, dust, icing risk, and hazardous-area requirements where applicable. | Allow for temperature changes during startup, shutdown, steam cleaning, and ambient weather. Use protective measures where freezing or contamination is possible. | Operating range: −20°C to 120°C Outdoor installation with weather protection |
Temperature or environmental extremes may alter set pressure, seal performance, and valve response. |
| 7 | Maintenance, Inspection, and Standards | Review inspection access, cleaning requirements, replacement parts, test documentation, and applicable pressure-equipment or process-safety standards. | Choose a design that can be removed and tested without excessive downtime. Establish periodic checks for lift movement, seat leakage, corrosion, and set-pressure accuracy. | Inspection interval: at least annually, or according to the site risk assessment and applicable regulations | Regular verification helps maintain reliable protection and identifies sticking or leakage before an emergency occurs. |
Note: Illustrative values are for selection guidance only. Final valve sizing and set-pressure verification should be based on vessel calculations, process conditions, certified flow data, and applicable local requirements.
7 Tips for Choosing a Vacuum Relief Valve
A vacuum relief valve protects tanks when liquid leaves faster than air enters. Choose its set pressure from a documented vacuum scenario, not a catalog default. Check API 2000 or ISO 28300 requirements, then confirm materials, temperature range, flow capacity, and allowable tank vacuum. Small errors matter. A valve that opens too late can deform a thin tank shell.
Maintenance deserves equal attention. The U.S. Department of Energy’s Operations & Maintenance Best Practices Guide reports that preventive maintenance can reduce costs by 12–18% compared with reactive work. Ask whether the valve can be isolated, inspected, cleaned, and tested without unsafe improvisation. Review API 576 guidance for inspection planning. Record opening pressure, seat condition, corrosion, and test dates. Field experience suggests that dust and sticky vapors often cause trouble before major mechanical failure. I have seen “maintenance-free” claims age badly.
Supplier reliability needs evidence. Request material certificates, pressure-test records, calibration details, and a clear nonconformance process. Compare quoted lead time with actual delivery history, not promises. Check whether replacement seals and springs remain available for the expected service life. The 2024 State of Industrial Maintenance report from Plant Services highlights persistent skills shortages and growing reliance on planned maintenance data. That makes readable manuals and responsive technical support practical safety controls. A low purchase price may hide expensive downtime. Recheck every assumption with your tank designer, especially when service conditions change.
Selection priorities for verifying standards, maintenance needs, and supplier reliability.
Use this checklist to compare valve options. Confirm the applicable design code, pressure and vacuum set points, material compatibility, capacity calculations, inspection access, documentation, and supplier support before purchase. API 2000 and ISO 28300 are commonly referenced for venting atmospheric and low-pressure storage tanks; the applicable edition and project requirements should always be verified.